Safety First | Rotisserie Components
Rotisserie Grilling Using a Charcoal Grill | Rotisserie Grilling Using a Gas Grill
Rotisserie Grilling Beef | Rotisserie Grilling Turkey | Guidelines for Proper Doneness
|
Rotisserie grilling is one of the oldest methods of cooking. For centuries, people have understood that food cooked slowly by constant rotation above a heat source provides flavor and tenderness that is difficult to match with any other cooking method. Rotisseries are built in a variety of sizes ranging from models able to accommodate a small chicken to large models used for roasting very large primal cuts of meat or whole animals such as a lamb or pig.
Food is not actually grilled when cooked on a rotisserie - it roasts. Meat, for example, is evenly cooked and becomes juicy and tender because of the self-basting action provided by the rotation of the rotisserie. At the same time, the heat source (most often a grill or open fire) provides the food with a smoked flavor and a pleasingly crisp surface. |
Safety First
|
As with any type of cooking, safety should always be of primary importance when rotisserie grilling. It is a safe, reliable cooking method when the proper procedures are performed and the equipment is used according to the instructions issued by the manufacturer. The tips listed below should be followed to ensure that rotisserie grilling is a safe process. 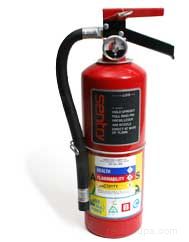
- Always follow the instructions issued by the manufacturer of the grill and the rotisserie unit to ensure safe use.
- Many charcoal and gas grills include rotisserie units or offer them as an option that can be added later. When a grill is not designed to accommodate a rotisserie, never reconfigure it with homemade devices for the purpose of attempting rotisserie grilling.
- Make sure all necessary tools and equipment are within reach before beginning.
- Make sure the power cord for the rotisserie unit does not cross a high traffic area.
- A fire extinguisher or water source should be readily available.
Since the heat source for rotisserie grilling is most often a charcoal or gas grill, many of the safety procedures are the same as those used for grilling:
- Always keep outdoor grills with rotisserie attachments away from the walls of buildings and from under low hanging tree branches when in use.
- Grills with rotisserie attachments designed for outdoor use only, should never be used inside a garage or other outdoor building.
- Grills with rotisserie attachments should be positioned in an area that is level, such as a patio or designated lawn space. This is not only advisable for safety considerations, but also to ensure that the rotisserie unit operates properly.
- If a grill with a rotisserie attachment is to be used on a wooden deck, a large piece of metal or a fireproof patio/deck protector should be placed under the unit. If the deck is attached to a building, the grill must be positioned as far away from the walls of the building as possible.
- When using a charcoal grill as the heat source for rotisserie grilling, never add starter fluid to coals that are already hot. This can create a very dangerous situation.
- When using gas grills equipped with automatic ignition, the burners should not be lit when the hood is closed. The build up of gas that can occur within the confines of the closed hood prior to igniting the burners may cause an explosion once the burners are lit.
- Outdoor rotisserie grilling should be avoided during periods of high wind.
- Children and pets should be kept away from the rotisserie grilling area.
- Never use chemically treated wood, such as scraps of pressure treated lumber, as fuel for a fire meant for rotisserie grilling.
|
Rotisserie Components
|
Rotisserie cooking requires three key components: the spit assembly (the device that holds the food above the heat source), a means to turn the spit, and a heat source for cooking.
Spit Assembly
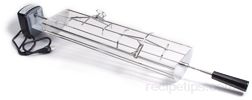
The spit is a device consisting of one or more metal bars onto which food is skewered so that it may be rotated above the heat source. Most spits can be raised or lowered above the heat source to control the cooking temperature. There are two types of spits that are most often used.
- The first type of spit consists of a long skewer that is pushed through the food. Depending on the size of the rotisserie unit and the total weight of the food that must be supported, the skewer may resemble a heavy round bar. After the food has been skewered, two prongs, or forks, are attached to each side of the food to hold it in place. The spit, or skewer, is placed on brackets that allow the food to be suspended above, or in front of, a heat source.
- A second type of spit is a split rod assembly in which two narrow skewers are pushed through the food and are attached to gears on both ends of the rotisserie unit. Because two skewers are used, additional hardware (such as the fork attachments used with the single skewer assembly) is not necessary to prevent the meat from slipping on the skewers while rotating above the heat source.
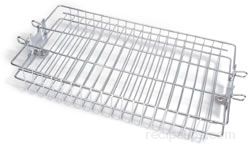
In addition to rods and skewers, there are a variety of rotisserie baskets available that allow rotisserie grilling of foods that cannot be skewered onto a traditional style spit. The rotisserie baskets are handy for cooking vegetables, fish, kabobs, chops, and any other flat or odd shaped food. Rotisserie baskets attach easily to a traditional spit.
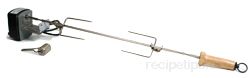
Rotisserie Motor
With the use of a mechanical or manual device, the spit slowly rotates at a consistent speed. The constant rotation of the rotisserie allows food to cook evenly. The first rotisseries were crude devices that required the spit to be rotated manually while the food cooked over an open fire. Before electric motors were built specifically for rotisseries, almost any method imaginable was used to power the rotisserie, although a hand crank was most commonly used. Manually operated rotisseries are still occasionally used in fireplaces and over open outdoor fires.
Modern rotisseries are equipped with an electric motor, which allows for constant rotation of the food. Rotisserie motors come in all sizes to accommodate the requirements of any type of rotisserie unit. Most charcoal and gas grills equipped with rotisseries include motors that are of sufficient power to rotate the greatest weight of food that can be properly cooked on that particular model.
Examples of Motorized Rotisseries
Heat Source
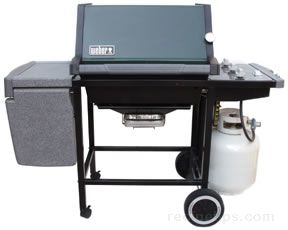
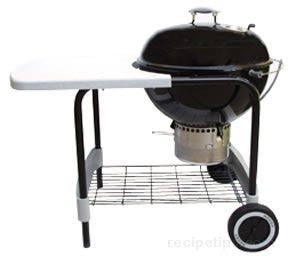
Some rotisseries are built as attachments for outdoor charcoal grills and many outdoor gas grills are equipped with rotisseries as a standard feature. Open fires are still a popular heat source for cooking large pieces of meat or whole animals on a rotisserie.
Although rotisserie grilling is most often thought of as an outdoor cooking method, it is also performed indoors. Indoor fireplaces have been used for centuries as a heat source for rotisserie cooking. Today, there are a variety of indoor electric countertop rotisseries, which consist of a self contained oven-like cabinet with a heating element in the back. The food roasts as it rotates on a spit in front of the heat source. The units come with temperature controls, timers, and a drip pan for collecting any melting fat. |
Rotisserie Grilling Using a Charcoal Grill
|
Rotisserie grilling on a charcoal grill is best accomplished when cooking with the indirect heat method (although direct heat can be used for certain foods). When using the indirect heat method for rotisserie grilling, the fire should be built away from the rotisserie unit so that the hot charcoal is not directly under the food. (See the article, "Outdoor Grill Preparation" for complete instructions for setting up a charcoal grill.) Rotisserie grilling requires an extended cooking time so fresh charcoal must be added every 30-40 minutes to maintain the proper cooking temperature and ensure even cooking.
Using the following steps for setting up a rotisserie
on a charcoal grill will ensure success when rotisserie grilling.
- Place the rotisserie ring inside the charcoal grill.
- Place the charcoal on one side of the grill so that it is not directly under the spit, but is parallel to it.
- Make sure the charcoal is well lit and the grill is preheated properly before the food is mounted to the rotisserie.
- A drip pan should be placed directly under the spit (a disposable aluminum pan works well) as a means for preventing flare-ups because of dripping grease and fat. It is important that the drip pan is at least as large as the food on the rotisserie.
- Pour ½-inch to 1-inch of water into the drip pan to create steam, which will rise and help to prevent moisture loss in the food.
- Slide one pair of prongs (a tool that resembles a large fork) onto the spit and then push the spit and prongs into the food. Slide the other set of prongs on the opposite side of the spit and insert the prongs into the food. The prongs prevent the food from slipping on the spit as it rotates.
- Each of the prongs includes a wing nut that should be tightened to keep the prongs firmly in place on the spit.
- The spit is then attached to the brackets of the rotisserie assembly. One end of the spit slides into the motor.
- Some rotisseries have counterweights that can be adjusted to provide proper balancing of the food on the spit. Proper balancing is an important step to ensure that the rotisserie motor is not overworked.
- When the counterweights have been set, start the motor and observe the rotation to ensure that the spit is properly balanced.
- When rotisserie grilling meat, check for proper doneness with a meat thermometer before removing the meat from the heat source.
- When the food is cooked to the desired doneness, remove the spit from the grill with heavy oven mitts and remove the spit from the food. When cooking meat, cover the meat with foil and allow it to rest for a few minutes or for whatever length of time is appropriate for the particular meat cut.
|
Rotisserie Grilling Using a Gas Grill
|
Rotisserie grilling on a gas grill is best accomplished when cooking with the indirect cooking method (although direct heat can be used for certain foods). Gas grills with a front and rear burner or three burners arranged in a line front to back, are the best models to use for rotisserie grilling. This is because the spit can be positioned in the center or front of the grill while the rear burner is used as the indirect heat source. If the gas grill is equipped with side-by-side burners it is often difficult to position the spit away from the burners; however, if the burners are set on low and a drip pan is placed over the burners to shield the direct heat, rotisserie grilling can be performed successfully. (See the article, "Outdoor Grill Preparation" for complete instructions for setting up a gas grill.)
|
|
Using the following steps for setting up a rotisserie
on a gas grill will ensure success when rotisserie grilling.
- Preheat the grill by setting all of the burners on high for a few minutes. (Follow the manufacturer's instructions for proper preheating.)
- A drip pan should be placed directly under the spit (a disposable aluminum pan works well) as a means for preventing flare-ups because of dripping grease and fat. It is important that the drip pan is at least as large as the food on the rotisserie.
- Pour ½-inch to 1-inch of water into the drip pan to create steam, which will rise and help to prevent moisture loss in the food.
- Slide one pair of prongs (a tool that resembles a large fork) onto the spit and then push the spit and prongs into the food. Slide the other set of prongs on the opposite side of the spit and insert the prongs into the food. The prongs prevent the food from slipping on the spit as it rotates.
- Each of the prongs includes a wing nut that should be tightened to keep the prongs firmly in place on the spit.
- The spit is then attached to the brackets of the rotisserie assembly. One end of the spit slides into the motor.
- Some rotisseries have counterweights that can be adjusted to provide proper balancing of the food on the spit. Proper balancing is an important step to ensure that the rotisserie motor is not overworked.
- When the counterweights have been set, start the motor and observe the rotation to ensure that the spit is properly balanced.
- The lid of the gas grill should be lowered and remain closed to ensure even cooking.
- When rotisserie grilling meat, check for proper doneness with a meat thermometer before removing the meat from the heat source.
- When the food is cooked to the desired doneness, remove the spit from the grill with heavy oven mitts and remove the spit from the food. When cooking meat, cover the meat with foil and allow it to rest for a few minutes or for whatever length of time is appropriate for the particular meat cut.
|
Rotisserie Grilling Beef
|
Beef is one of the most popular foods cooked using rotisserie grilling. Most recipes for rotisserie grilling beef can be used for grilling, broiling, or roasting if the cooking time is adjusted accordingly. High quality meat usually does not require too many additional flavorings, so a particular recipe may not be necessary. A coating of olive oil, salt, and pepper may be all that is necessary or a rub of fresh herbs may be used to create a flavorful crust on the exterior.
It is important to first follow the proper setup procedures for the grill when cooking food with rotisserie grilling. (See the article, "Outdoor Grill Preparation" for complete instructions for setting up a charcoal or gas grill.) There are two methods of grilling beef using a rotisserie: direct heat cooking and indirect heat cooking. The cooking method is determined by the position of the rotisserie in relation to the heat source.
Rotisserie Grilling Beef with Direct Heat
When the rotisserie is placed above the heat source, it is known as direct heat cooking and results in beef with a grilled quality. This method of rotisserie grilling is best for small, thin cuts of beef that tend to cook quickly; however, these types of cuts are most often cooked directly on the grate of the grill rather than with rotisserie grilling.
A rotisserie basket can be used for cooking flat pieces of beef. This allows the meat to be cooked on the rotisserie without having to be directly skewered, which can be rather cumbersome procedure when using flat cuts of beef.
Rotisserie Grilling Beef with Indirect Heat
Indirect heat cooking is the method most often used for rotisserie grilling beef and indeed, for most foods cooked in this manner. Indirect heat cooking allows the meat to cook slowly and evenly, becoming juicy and tender because of the self-basting action provided by the rotation of the rotisserie. These qualities are the chief reasons for using a rotisserie unit for cooking food.
When using indirect heat cooking, the rotisserie is positioned in front of or next to the heat source. The indirect heat allows the interior portions of the beef to cook thoroughly while allowing the exterior to become crispy and flavorful without becoming overcooked.
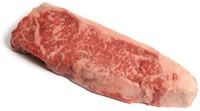
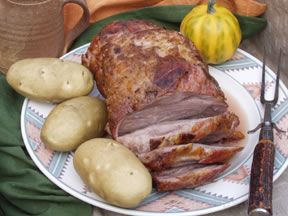
Large, cylindrical beef cuts are the best choices for rotisserie grilling with indirect heat. Oven roasts, such as a tenderloin roast or a rolled boneless rib roast, are excellent candidates. Rib-eye roasts and top loin roasts are equally good choices. Tender cuts that are flat or irregularly shaped can be formed into a cylindrical shape if they are boned, rolled, and tied.
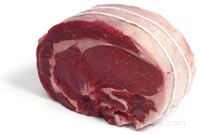 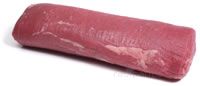
Rolled Boneless Rib Roast and a Tenderloin Roast:
Excellent Choices for Rotisserie Grilling with Indirect Heat
Market ready cuts from the round and chuck are usually not suitable for cooking with a rotisserie because they tend to be tougher than loin and rib cuts and lack the marbling that is important for keeping the meat tender while cooking; however, they can be quite flavorful and acceptably tender if they are marinated for several hours and are not overcooked. |
Rotisserie Grilling Turkey
| Rotisserie Grilling a Whole Turkey
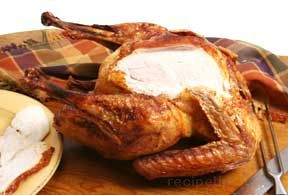
It is important to first follow the proper setup procedures for the grill when cooking food with rotisserie grilling. (See the article, "Outdoor Grill Preparation" for complete instructions for setting up a charcoal or gas grill.) For the best results when rotisserie grilling a whole turkey, it is important that the rotisserie unit be position away from the heat source. Never place the rotisserie directly over the heat when cooking a whole bird because the exterior of the turkey may become overdone before the interior portions have reached the acceptable level of doneness. 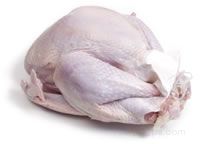
If a turkey isn't too large, it can be grilled using a standard size rotisserie unit that is often included with an outdoor gas grill or with a unit that attaches to a charcoal grill. A 12 to 14 pound bird is often the maximum weight that can be accommodated on a standard unit.
Make sure the turkey is properly trussed. (It is often easiest to attach the bird to the spit prior to trussing because it can be less difficult to handle.) If the turkey is not trussed, the legs and wings will flop about as the spit rotates and it will not be possible to balance the spit correctly. A few simple steps are all that are necessary to properly truss the turkey before it is rotisserie grilled:
- The ends of the legs should be tied together with string (nylon leg clamps also work well).
- A string should be tied around the turkey at the meaty part of the legs to keep them close to the body.
- Another string can be tied around the wings and breast section of the bird to prevent them from flopping about as the rotisserie rotates.
The turkey must be attached properly to the spit assembly. Always refer to the manufacturer's instructions for the correct procedure. Some rotisseries have counterweights that can be adjusted to provide proper balancing of the turkey on the spit. Proper balancing is an important step to ensure that the rotisserie motor is not overworked.
Allow 10 to 15 minutes cooking time per pound, which means that a 14 pound turkey may require 3 to 4 hours of cooking time on the rotisserie, so plan accordingly. Always use a meat thermometer to check for proper doneness. Although rotisserie grilling is very similar to oven roasting, the process does not heat the interior of the turkey as quickly as oven roasting; therefore, it is important that a turkey intended for rotisserie grilling is not stuffed. The slower cooking time may not kill harmful bacteria (that may be present in the stuffing) as rapidly as with oven roasting. It is also important to remember that a turkey should not be cooked with any cooking method unless it is fully thawed. |
|
Rotisserie Grilling Turkey Parts
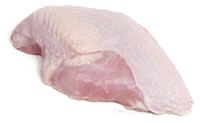
Turkey parts may also be cooked with rotisserie grilling when a rotisserie basket is used. It can be difficult to mount parts such as wings or legs onto a traditional spit so the rotisserie basket is an excellent solution to ensure that the rotisserie motor is not overcooked and that the meat is evenly cooked. Some turkey parts, such as large boneless turkey roasts or boneless breasts, may be mounted onto a spit, especially if they have been shaped and tied, but often the best results occur when they are placed into a rotisserie basket.
Smaller turkey parts can be rotisserie grilled with direct heat cooking or indirect heat cooking. Direct heat cooking will provide a more noticeable grilled quality to the meat, but care must be taken to ensure that the exterior does not become charred or overdone before the interior portions of the turkey parts have reached the proper temperature for adequate doneness. |
|
Turkey Rotisserie Grilling Review
Important Points to Remember when Rotisserie Grilling a Whole Turkey 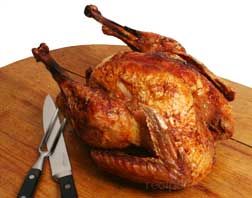
- Follow the proper setup procedures for the grill and for the rotisserie unit.
- The turkey should not be larger than 14 pounds.
- Make sure the turkey is trussed prior to cooking. It may be easiest to truss the bird after it is positioned on the spit.
- The turkey must be attached securely to the spit assembly (it must not slip on the spit as the rotisserie rotates).
- The turkey must be balanced properly on the rotisserie.
- Always use a meat thermometer to check the interior portions of the turkey for proper doneness.
|
Guidelines for Proper Doneness
|
The proper doneness of foods cooked with rotisserie grilling is determined by a number of criteria depending on the type of food that will be cooked and the size and density of the food. |
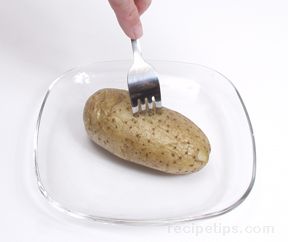
The doneness of vegetables can often be determined by visual inspection or simply by checking for the desired tenderness with the insertion of a fork. Vegetables are well done if the fork inserts easily; however, many people prefer vegetables that retain some of the crispness when raw. |

A visual inspection is often adequate to determine the proper doneness of certain meat cuts. Cuts of beef or lamb, for example, will have a crispy exterior with a dark brown color. The meat may begin to split apart. The interior portion may be quite pink or it may be gray or brown, depending on the desired doneness. |
Pork cuts should be cooked until the interior meat is opaque with only a hint of pink. Pork that is still quite pink or red in the center should not be served until it has cooked for a longer period. (An internal temperature of 160ÂşF is recommended.) |
Poultry will have a crispy brown skin when rotisserie grilled and the meat will appear opaque throughout. The juices will run clear if the meat has been cooked sufficiently. (An internal temperature of 180ÂşF is recommended.) |
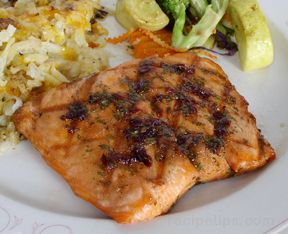
Fish is safe to eat when the meat flakes easily with a fork and appears opaque throughout. The exterior may take on a golden brown appearance when rotisserie grilled (depending on the type of fish and the particular recipe). |
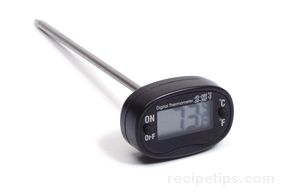
The most reliable method for determining proper doneness is with an accurate meat thermometer. It is especially important to use a meat thermometer when rotisserie grilling pork or poultry. |
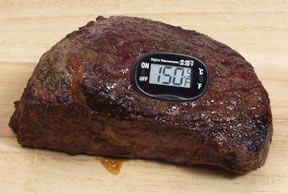
To check the temperature of meat, the thermometer must be pushed through the thickest part of the meat, away from any bones (bones conduct heat). |
A cooking time chart can be used as a guide for determining proper doneness of foods; however, the chart does not allow for the many variables that often influence doneness, such as the type of heat source used for rotisserie grilling, the actual cooking temperature, the temperature of the food prior to cooking, etc. Remember, a cooking time chart should be used as a guide only and should not be used as a substitute for the accuracy of a good meat thermometer. |
|
Type of Food |
Safe Internal
Temperature |
Cooking Time
(Approximate) |
Chicken
(whole - 4 pounds) |
180Âş F |
70 - 75 minutes total |
Chicken
(breast) |
180Âş F |
35 - 40 minutes total |
Chicken
(thigh) |
180Âş F |
60 minutes total |
Game Hen
(2 pounds) |
180Âş F |
35 - 40 minutes total |
Turkey
(whole) |
180Âş F |
10 - 15 minutes
per pound |
Pork
(roast or chops) |
160Âş F |
20 minutes per pound |
Pork
(spare ribs) |
160Âş F |
30 minutes per pound |
Beef
(roasts or steaks) |
150Âş F - 165Âş F
(medium) |
15 minutes per pound |
Lamb
(roasts or chops) |
155Âş F - 160Âş F
(medium) |
20 minutes per pound |
Veal
(roast) |
150Âş F - 160Âş F
(medium) |
15 minutes per pound |
Fish
(whole) |
155Âş F
(or until opaque and flaky) |
20 minutes total |
|