|
Safety First
Preparing a Charcoal Grill for Cooking | Preparing a Gas Grill for Cooking
Safety First
|
Although preparing and using an outdoor grill for cooking is not a complicated process, the most important aspect to be mindful of at all times is safety. Outdoor grills are safe and reliable when they are used according to the manufacturers' instructions; however, they may pose a danger when care is not taken during their use or they are used for a purpose for which they were not intended. The following safety tips should always be considered when using an outdoor grill.
- When in use, always keep outdoor grills away from the walls of buildings and from under low hanging tree branches.
- Never use outdoor grills inside a garage or other outdoor building.
- Grills should be positioned in an area that is level, such as a patio or designated lawn space, but should never be used in similar areas that may be covered with a roof.
- If a grill is to be used on a wooden deck, a large piece of metal or a fireproof patio/deck protector should be placed under the unit. If the deck is attached to a building, the grill must be positioned as far away from the walls of the building as possible. Rings or kettles designed for wood burning (onto which a cooking grate could be placed) should never be used on a deck.
- When using a charcoal grill, never add starter fluid to coals that are already hot. This can create a very dangerous situation.
- When using gas grills equipped with automatic ignition, the burners should not be lit when the hood is closed. The build up of gas that can occur within the confines of the closed hood prior to igniting the burners may cause an explosion once the burners are lit.
- Outdoor grills should not be used during periods of high wind.
- An outdoor grill should never be left unattended and children and pets should always be kept away from the grilling area.
- Never use chemically treated wood, such as scraps of pressure treated lumber left over from an exterior building project, as fuel for a fire meant for grilling.
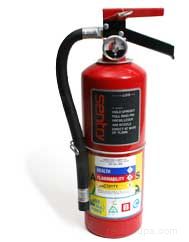
- A fire extinguisher or water source should be readily available.
|
Preparing a Charcoal Grill for Cooking
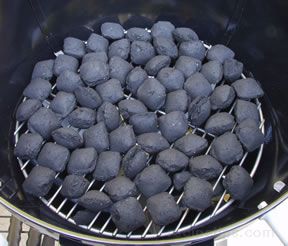 When determining the proper amount of charcoal to use, first decide on how much of the area of the grate that will be required for cooking. An even layer of charcoal briquettes should be spread across the entire bottom of the grilling unit if the entire surface of the cooking grate will be used. When only a portion of the grate will be used for cooking, the coals should extend about two inches beyond the area of the grate where the food will be grilled. When determining the proper amount of charcoal to use, first decide on how much of the area of the grate that will be required for cooking. An even layer of charcoal briquettes should be spread across the entire bottom of the grilling unit if the entire surface of the cooking grate will be used. When only a portion of the grate will be used for cooking, the coals should extend about two inches beyond the area of the grate where the food will be grilled. |
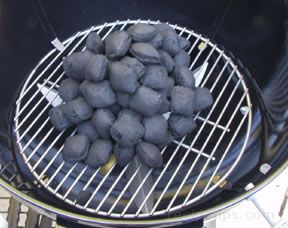
Once the required amount of charcoal has been determined, it should be gathered into a mound in the center of the grilling unit. This makes it much easier to ignite the charcoal. Open the bottom vents of the grill before lighting the charcoal. |
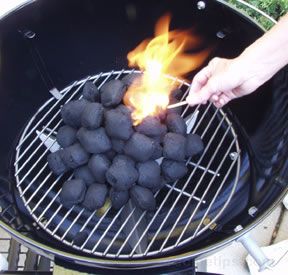
Self-lighting charcoal briquettes are a popular type of charcoal because of the ease in which they ignite. The briquettes contain a petroleum product that is easily lit with a long match. For people who do not like using petroleum products, untreated charcoal briquettes can be used. A chimney starter, which is a tall, cylindrical device, can be used as an aid in lighting the charcoal. Newspaper is placed at the bottom of the chimney and the charcoal is placed on top. The newspaper is lit from the bottom and the fire is drawn up through the charcoal above. |
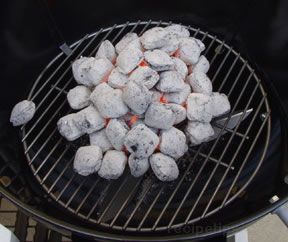
The charcoal is ready when the coals are glowing and are evenly coated with a layer of gray ash. This process usually requires at least 30 minutes. Using a long handled metal tongs or fireplace implement to spread the hot coals evenly across the bottom of the grilling unit under the area where the food will be grilled. The charcoal also can be placed in several different configurations for indirect heat grilling. (See the article, "Grilling Methods.") |
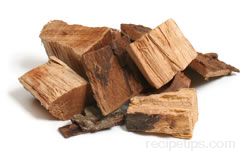 The addition of aromatic wood is a popular practice. Hardwoods, such as apple, hickory, and oak, provide a pronounced smoked flavor to food. Small logs, woodchips, or wood chunks are most often used. It is usually recommended that woodchips and chunks be soaked in water prior to use, but always follow the manufacturer's instructions if using a commercially marketed brand. Softwoods should be avoided because they burn too quickly, emit too much soot, and do not provide good flavor. Never used chemically treated scrap lumber for smoking food or as a fuel for cooking. The addition of aromatic wood is a popular practice. Hardwoods, such as apple, hickory, and oak, provide a pronounced smoked flavor to food. Small logs, woodchips, or wood chunks are most often used. It is usually recommended that woodchips and chunks be soaked in water prior to use, but always follow the manufacturer's instructions if using a commercially marketed brand. Softwoods should be avoided because they burn too quickly, emit too much soot, and do not provide good flavor. Never used chemically treated scrap lumber for smoking food or as a fuel for cooking. |
|
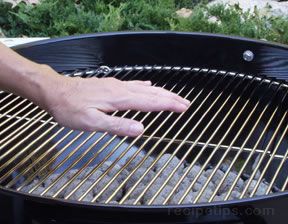
A convenient method for estimating the heat level emitted by the charcoal fire is to place the palm of your hand three or four inches above the grilling grate. The length of time that you can leave your hand above the grate before having to remove it (because of the discomfort from the heat) determines the heat intensity.
|
Length of Time - Hand
over Grate |
Estimated Level of
Heat Intensity |
Approximate Grill
Temperature |
|
10 seconds |
Low Heat |
225° - 250° |
|
8 seconds |
Medium-low Heat |
250° - 325° |
|
6 seconds |
Medium Heat |
325° - 375° |
|
4 seconds |
Medium-high Heat |
375° - 450° |
| 2 seconds |
High Heat |
450° - 650° |
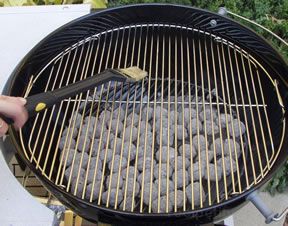
The grate should be oiled before grilling any food. Use a long handled brush for this purpose. Oiling the grate will help prevent food from sticking to it and will make cleanup easier. |
| Most charcoal grills can be used for cooking for about one hour before the coals begin to die out and the heat is no longer sufficient to continue grilling. If a longer cooking time is required, the coals must be replenished. It is best to remove the grate, add the coals, and wait until they are properly lit before continuing with the cooking process. The fresh charcoal usually requires only half the length of time (about 15 minutes) to be ready than charcoal started from scratch. |
Preparing a Gas Grill for Cooking
|
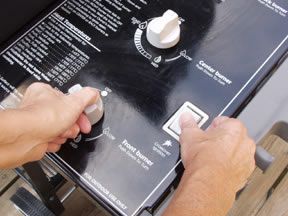 An automatic ignition device, which makes starting the burners a very simple process, is a standard feature on most modern gas grills. On multiple burner gas grills, one burner is usually designated as the starter burner. Once it is lit, all of the other burners can be lit from this source (the fuel lines are joined to it). An automatic ignition device, which makes starting the burners a very simple process, is a standard feature on most modern gas grills. On multiple burner gas grills, one burner is usually designated as the starter burner. Once it is lit, all of the other burners can be lit from this source (the fuel lines are joined to it).
Before attempting to ignite the burners, make sure the valve on the gas tank is turned on. The gas tank is located below the grill unit. A hose connects the gas tank to the fuel lines of the grill. When you are sure that gas is flowing into the grill unit, turn the control knob for the primary burner to the "start" position and then push the ignition switch to light the burner. |
| Note: Before attempting to light the burners with the automatic ignition feature, it is very important to open the hood of the gas grill. The build up of gas that can occur within the confines of the closed hood prior to igniting the burners may cause an explosion once the burners are lit. Always follow the instructions for proper and safe use provided by the manufacturer. |
|

If you are unable to see that the burner has lit, you can hold the palm of your hand over the grill grate in order to feel the heat rising from the burner.
|
|
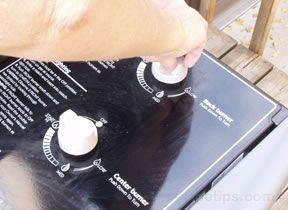
When the primary burner is lit, the other burners may be ignited simply by switching on their respective control knobs to start the flow of gas. The control knobs for all of the burners should be turned to the "high" setting in order to preheat the grill properly.
|
|
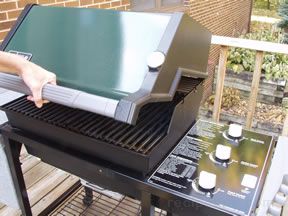
While the grill is preheating, the hood should be closed to hold in the heat. The grill should be preheated for at least 10 minutes prior to cooking. The temperature under the grill hood should reach 500º F. Some gas grills are equipped with thermometers built into the hoods (as shown on the right front of the hood of the grill pictured), which provide a reasonably accurate temperature reading when the hood is closed.
|

The grate should be oiled before grilling any food. Use a long handled brush for this purpose. Oiling the grate will help prevent food from sticking to it and will make cleanup easier. | |